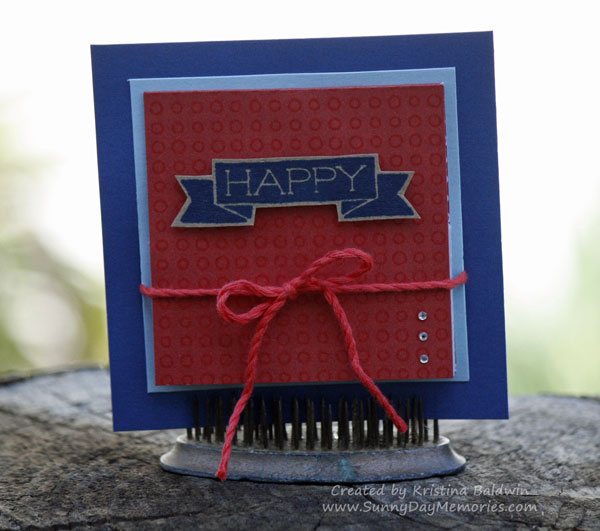
One of the projects we created at this month’s Technique Time Class was this fun “Happy” Turkish Fold Card.
There’s a real simplicity to the card, but then when you open it up, it has a wonderful “wow” factor!


I also believe that this technique lends itself to our 2-sided papers. Simply choose the lighter pattern to be the inside of the card with the bolder colors/patterns to keep the rest of the card visually appealing.
Rather than re-creating the wheel, I did some Google searches and found a wonderful diagram of how to create this particular fold. It actually can be quite tricky to describe with words, but these pictures truly convey how to do it with real clarity. And trust me, once you do this fold a time or two and really understand how to do it, it is so simple to re-create over and over again! The trick is to start with a square piece of paper–keeping in mind after it’s all folded, it will be half the size of what you started with.
This diagram is from Green Chair Press (www.greenchairpress.com). There are also other step-by-steps for variations of this fold. Really fun stuff! I definitely need to try them out now that I’ve found them.
Fold a square sheet of paper in half, along the grain.
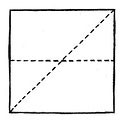 Open it and fold the sheet along one diagonal.
 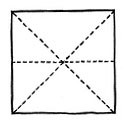 Open it and fold along the other diagonal.
 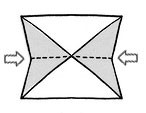 Open the sheet and push the gray areas of the sheet together along the horizontal fold (you are reversing this fold).
 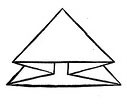 The sheet should look like this now.
 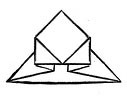 Fold the edges (wings) of one side to the middle.
 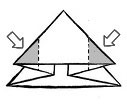 Open the wings and push them toward the center along the diagonal fold, reversing the folds as you push in (this is the trickiest part of the fold).
 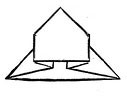 Your sheet should look like this. Turn it over and repeat the last 2 steps.
 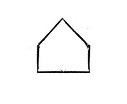 This is what the folded sheet should look like when you’re all done.
 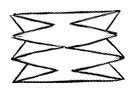 If you squeeze the point of the triangle and look inside, it should look like this.
Supplies used:
- Regatta Paper Packet (X7206B)
- Paper Fundamentals Enchantment (Z3126)
- Kraft Cardstock (Z1375)
- White Daisy Cardstock (1385)
- Sapphire Cardstock (X5775)
- My Anchor Stamp Set (C1642)
- Sapphire Stamp Pad (Z2648)
- Poppy Stamp Pad (Z2652)
- My Anchor Thin Cuts (Z3202)
- Poppy Thick Twine (Z3094)
- Bitty Sparkles (Z1263)
- Bone Folder (Z1204)
- Thin 3-D Foam Tape (Z2060)
- Micro Glue Dots (Z2089)
If you haven’t tried this before, you really should! I’ve adhered several of these together in the past to create a mini scrapbook album–super cute and really easy once you get the fold down. Give it a try and then leave us a comment and let us know what you think! Enjoy.

