For the past 7 weeks, I’ve been sharing holiday project tutorials with those who’ve signed up for our mailing list. So far we’ve shared 5 holiday card ideas and are in the middle of our gift ideas (tomorrow will be the 3rd gift idea.) If you haven’t signed up yet, you can do so before tomorrow at 1 pm (PDT) and receive the remaining project tutorials.

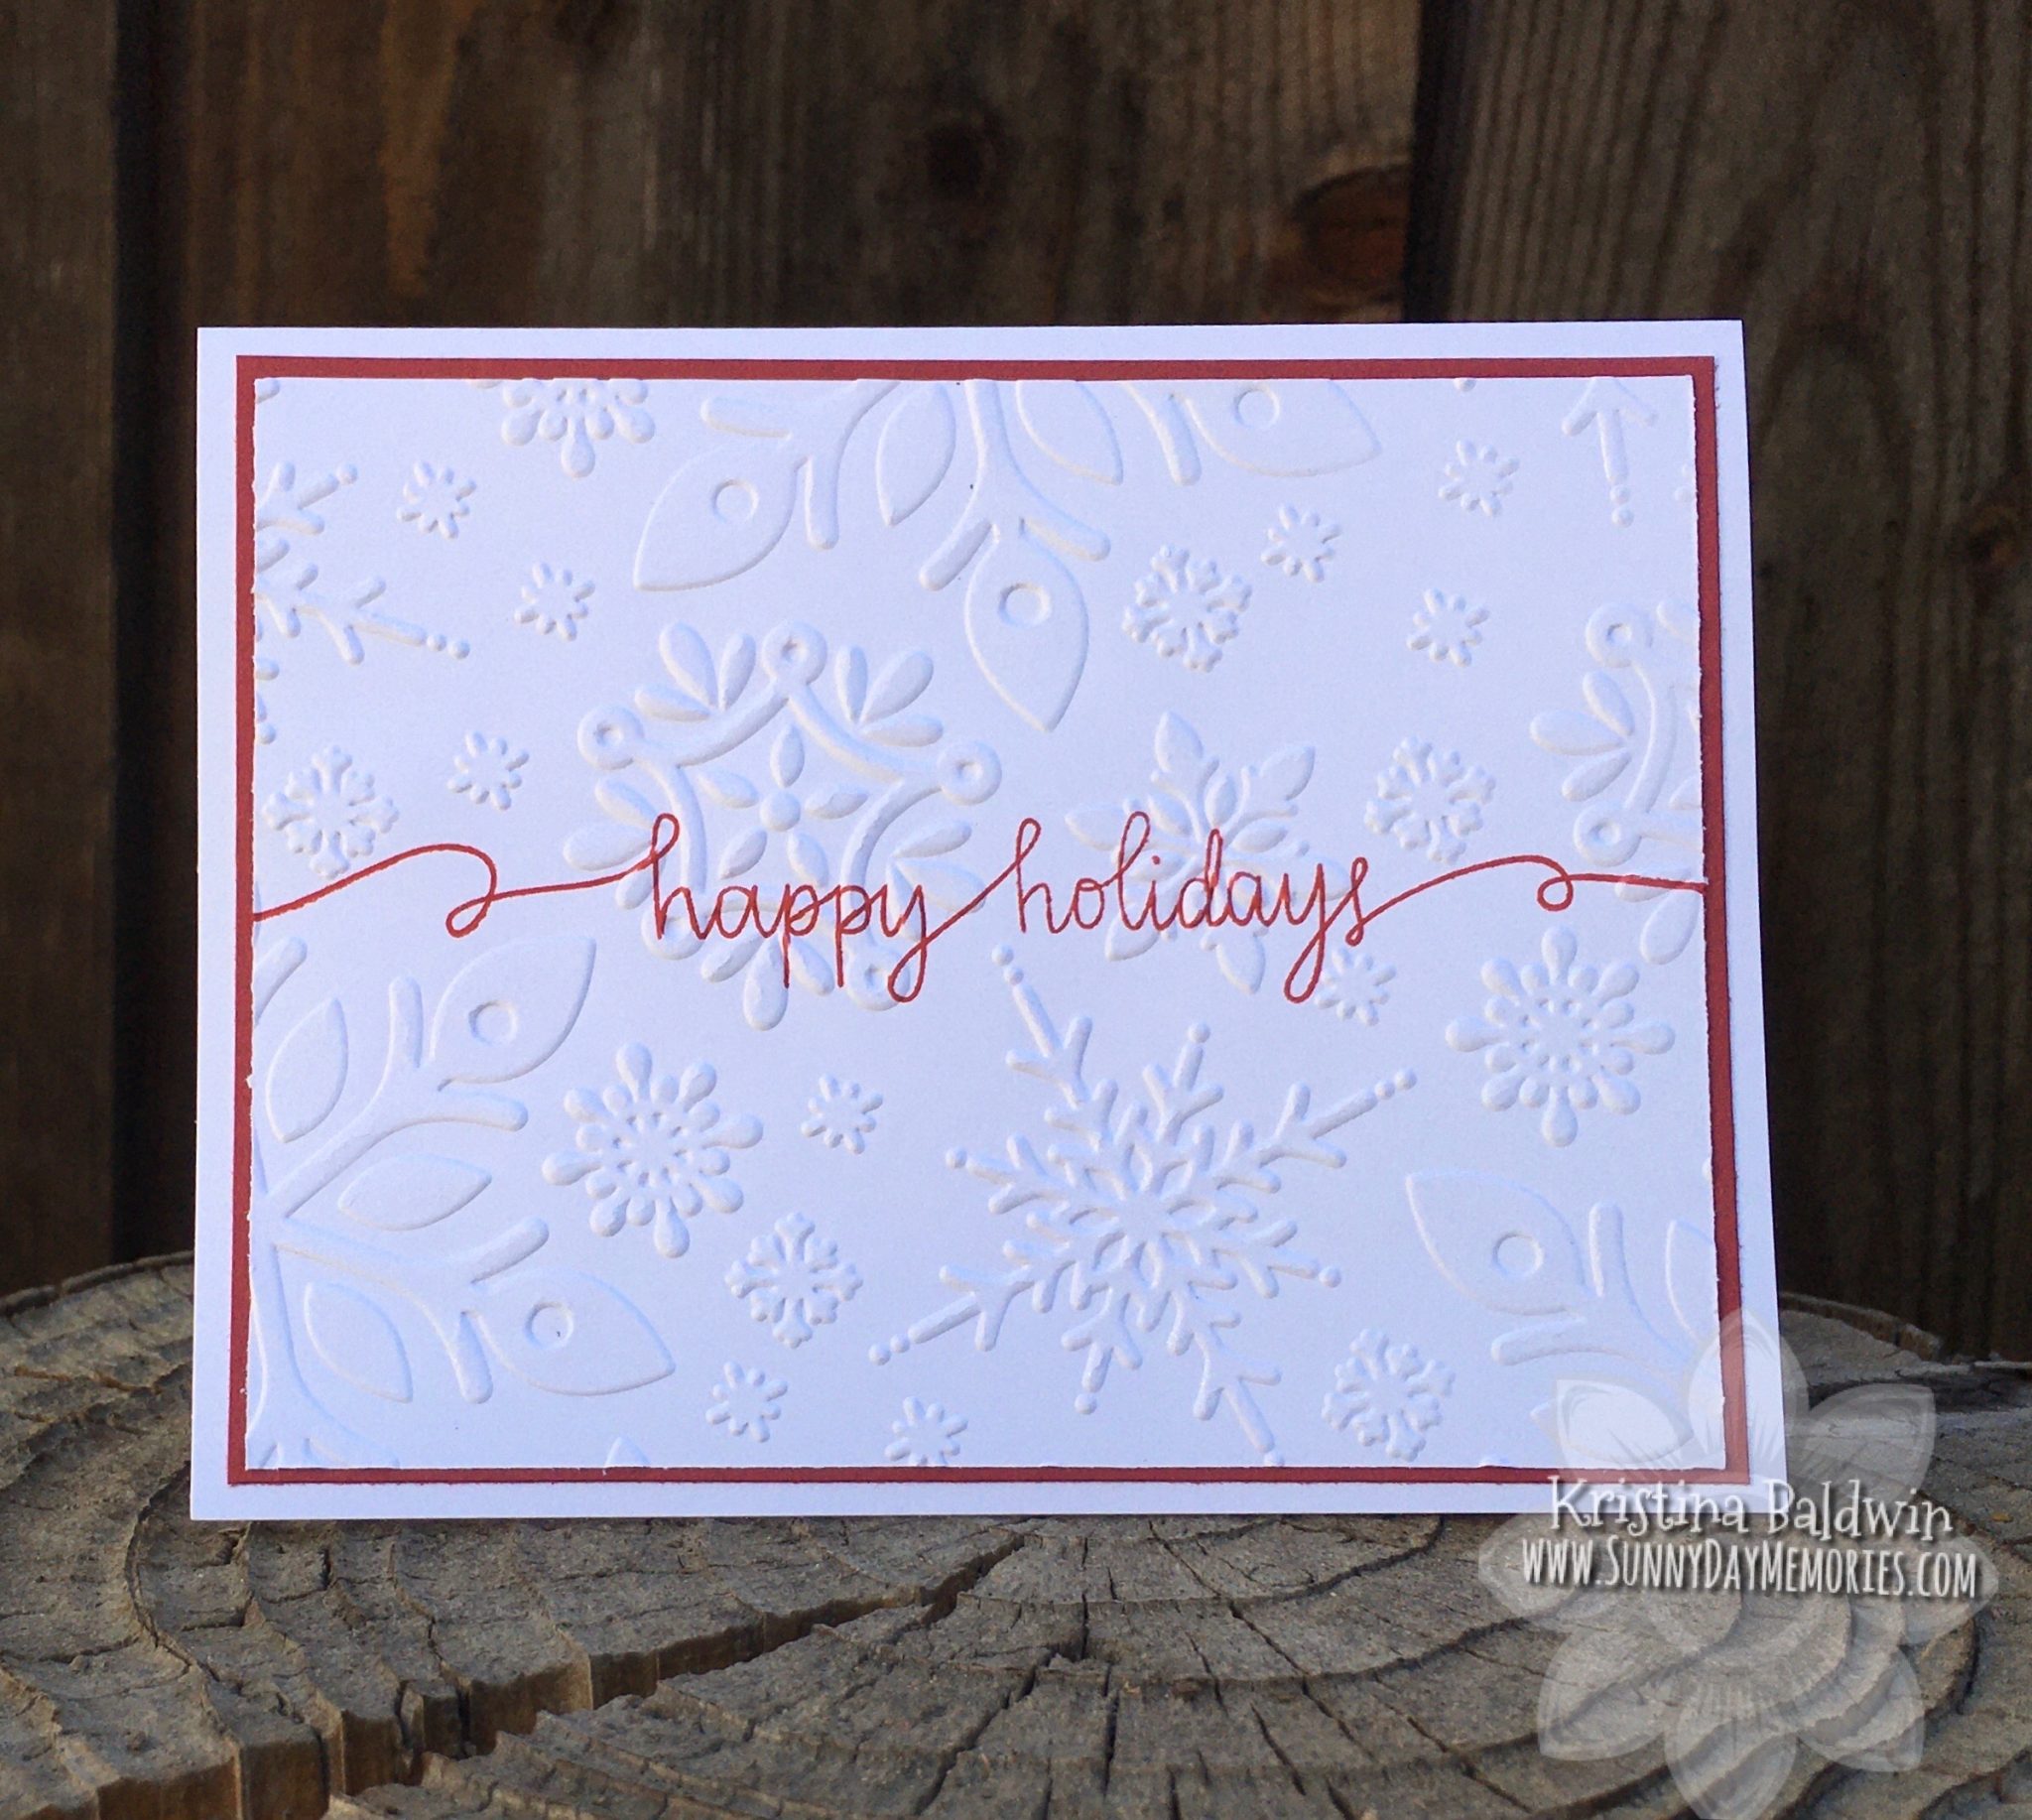
In the spirit of the holiday tutorials, I thought I’d share a super simple, yet beautiful card idea. It’s perfect for mass producing and still has a real wow factor to it because of the embossing and shimmer brush.
SUPPLIES
Stamps:
- Holiday Trimmings Stamp Set (C1810)
Inks:
- Ruby Stamp Pad (Z2870)
Papers:
- White Daisy Cardstock (1385) 3-7/8″ x 5-1/8″
- Ruby Cardstock (X5965) 4″ x 5-1/4″
Accessories:
- White Value Pack Cards & Envelopes (X254)
- Bonding Memories Glue (1512)
- Snowflake Embossing Folder (Z3518)
- Clear Shimmer Brush (Z3293)
- Cuttlebug, Sizzix or similar die cutting/embossing machine
INSTRUCTIONS
- Adhere Ruby Cardstock to center of card front using Bonding Memories Glue (top fold card.)
- Using Ruby ink, stamp “happy holidays” sentiment across center of White Daisy Cardstock. Then run it through your embossing machine using the Snowflake Embossing Folder.
- Adhere stamped/embossed White Daisy Cardstock to center of Ruby Cardstock.
- Add Clear Shimmer Brush to random embossed snowflakes to add some sparkle.

Pretty easy, right? And so beautiful, too. Be sure to sign up to get the remainder of the 12 Weeks of Christmas tutorials (see the upper right-hand corner of my blog to sign up.) And if you want to get all 12 projects with additional photos and tips, you can purchase the complete tutorial HERE.
