

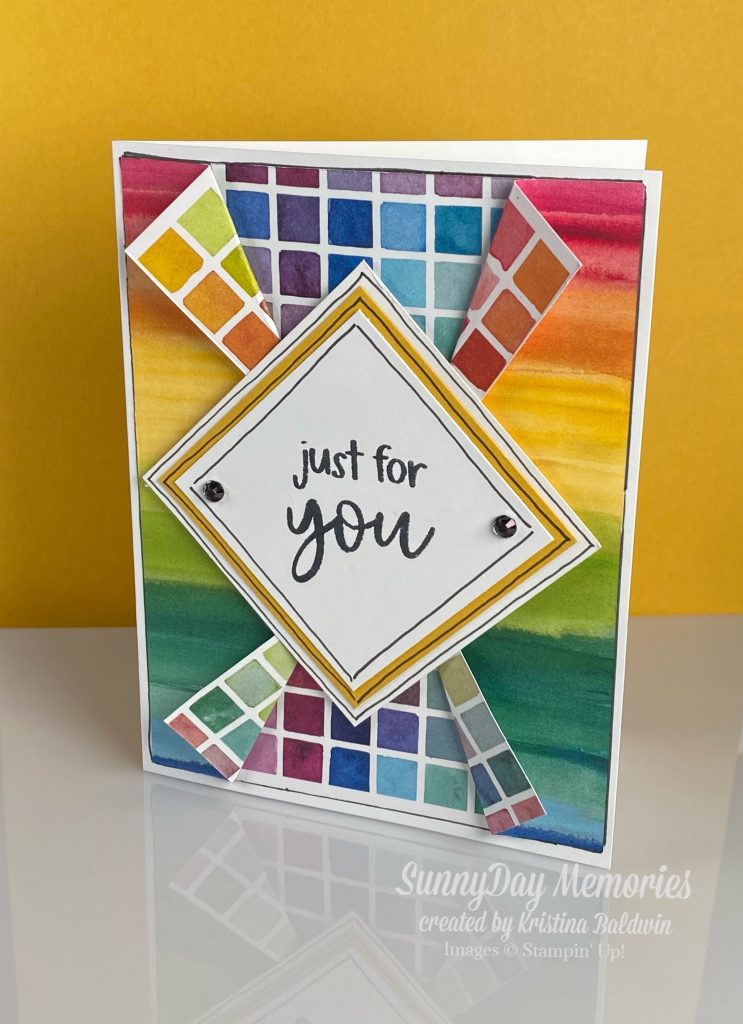
Are you ready to learn a Fun Fold Card using 6″x6″ patterned paper? Sometimes when you’re used to using 12″x12″ patterned paper it can be challenging to envision how to really best utilize this smaller size. And since Stampin’ Up offers a variety of these 6″x6″ papers, I thought you might find this card design quite handy. Plus, it looks much more complicated than it really is. So your recipient will think you really labored over it. But in fact it might become one of your new favorite quick & easy designs to create!
Are you ready? Let’s get started.
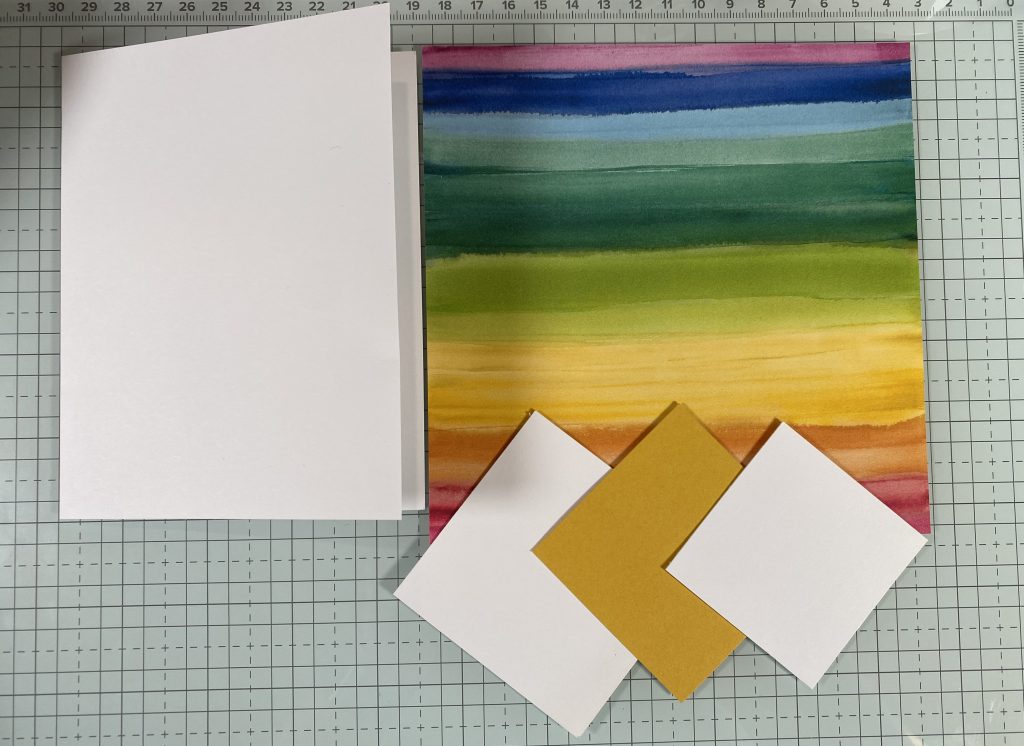
Step 1: Grab your supplies
You’ll need:
- A standard A2 card base that measures 4-1/4″ x 5-1/2″ once folded
- a double-sided 6″ x 6″ piece of patterned paper (make sure you like both sides!)
- a 2-1/2″ square of cardstock that coordinates with your patterned paper
- a 2-1/4″ and 2-3/4″ square of neutral cardstock that coordinates (you’ll be stamping on the smaller 2-1/4″ square)
- stamps, inks & embellishments
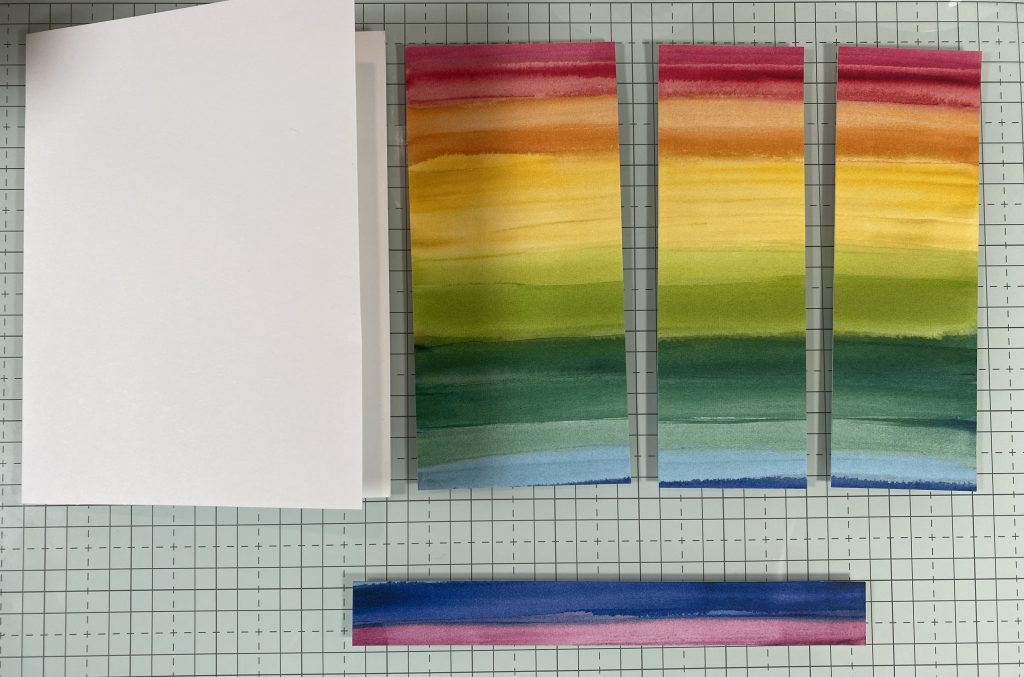
Step 2: Cut your 6″ x 6″ patterned paper
Always look at your paper and see if it has a directional pattern to it before you cut as this may determine how you cut it.
Your first cut will be at 5-1/4″. This will give you a 5-1/4″ x 6″ piece and then a 3/4″ x 6″ piece.
Then rotate your 5-1/4″ x 6″ paper and cut it at 3-1/2″ (along the 6″ side.) This gives you a 3-1/2″ x 5-1/4″ piece and then a 2-1/2″ x 5-1/4″ piece. This last piece is the middle panel of your card. You will then cut the 3-1/2″ piece in half at 1-3/4″ so that you have 2 equal size 1-3/4″ x 5-1/4″ pieces.
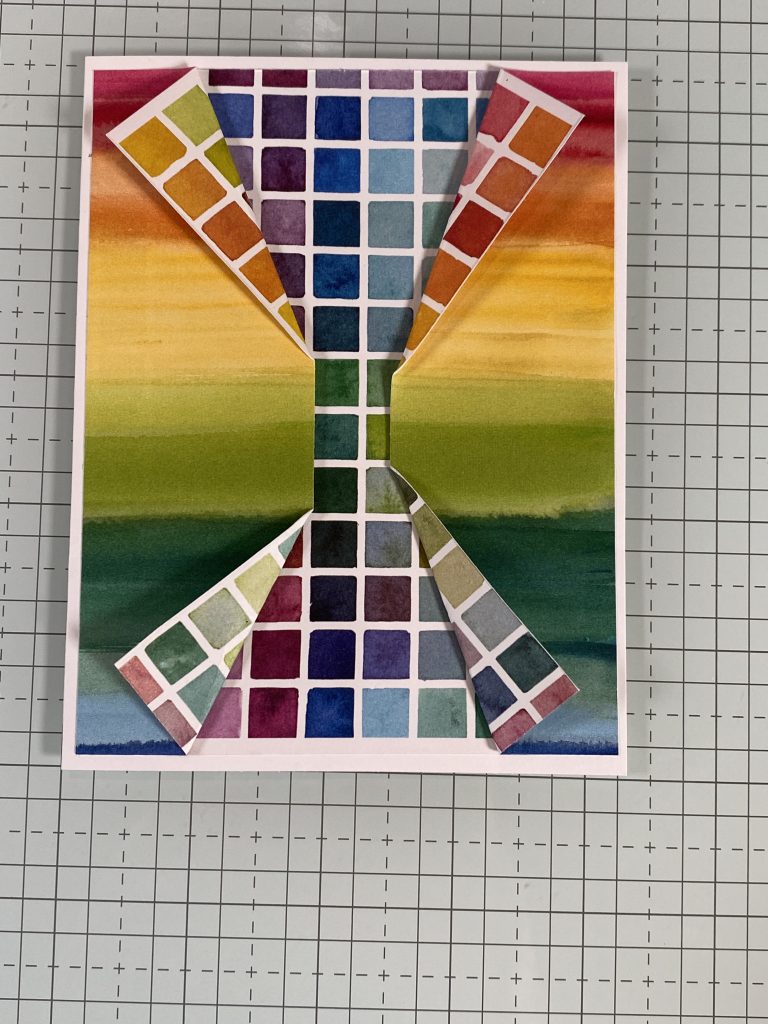
Step 3: Adhere your initial pieces
Start by adhering the 2-1/2″ x 5-1/4″ patterned paper to the center of your card base. You should have an equal border on top and bottom and on both sides.
Then adhere the (2) 1-3/4″ x 5-1/4″ strips to the card base but only apply adhesive to the outer edge of the strips so that the portion overlapping the middle panel is not adhered down. So only place a strip of glue on the right long edge of the right side strip and only a strip of glue on the left long edge of the left side strip.
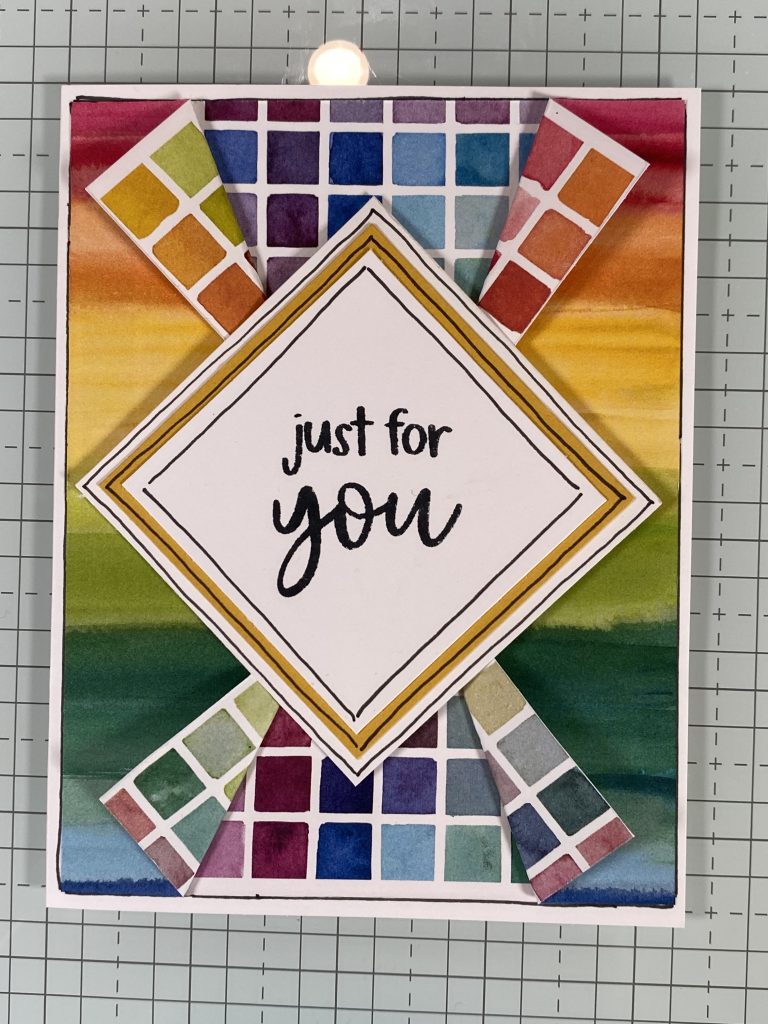
Here is where the magic happens. You want to fold back the first corner that is not adhered over the center panel. You’ll fold it back from the point where the middle panel ends (so you don’t show the cardstock of the card base) down toward the center of the card. You can make this a shallow or more elongated fold–it’s up to you. However, you will want to have the 3 remaining folds match or mimic this same style fold.
Step 4: Stamp and adhere focal point
Stamp sentiment or focal point desired on the 2-1/4″ square of cardstock in a diamond orientation. Layer this piece on the 2-1/2″ square of cardstock and then the 2-3/4″ square of cardstock. Using 3-D Foam, adhere this piece in the center of the card. This helps ground and hold the folded back corners in place without any use of adhesive.
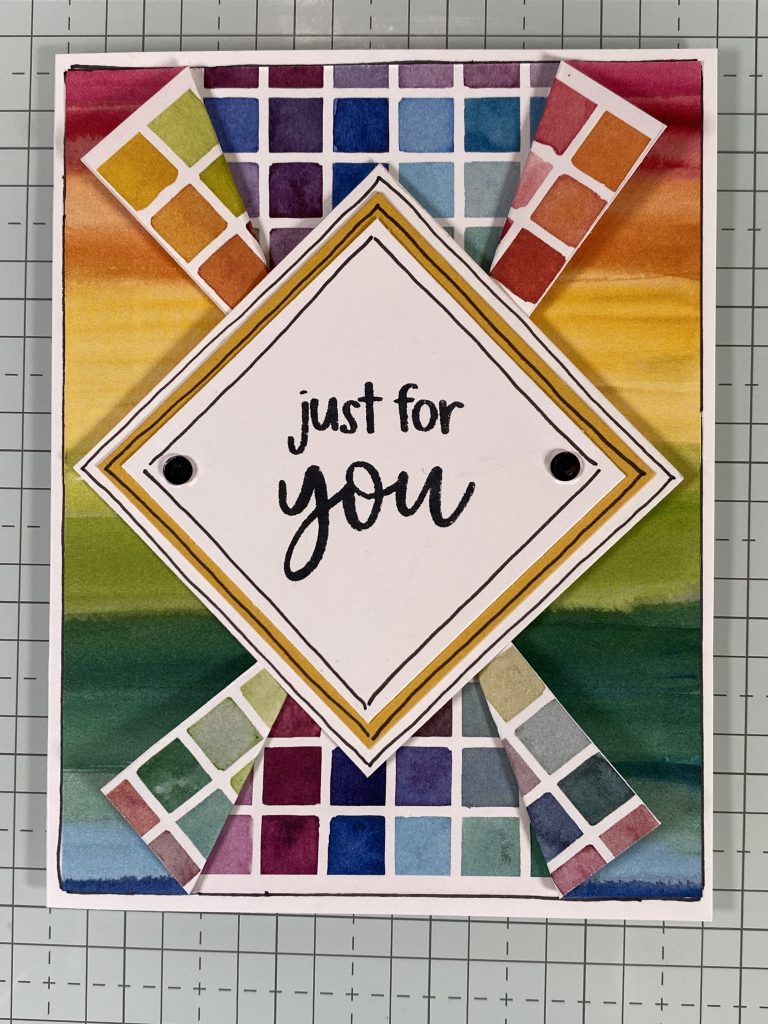
Step 5: Embellish
Finish your card by embellishing as desired.
👉 Here are the supplies I used to create my card:
- Attention Shoppers Stamp Set (163640)
- Full of Life 6″ x 6″ Designer Series Paper (163357)
- 8-1/2″ x 11″ Basic White Cardstock (159276)
- 8-1/2″ x 11″ Crushed Curry Cardstock (131199)
- Rhinestone Basic Jewels (144220)
- Basic Black Stampin’ Write Marker (162481)
- Basic Black Stampin’ Blends Combo Pack (154843)
Want to see the steps in action? Here is a video I did in my SunnyDay Memories Crafty Friends Private Facebook Group.
Easy, right? And it looks so great. The recipient will definitely be wowed by your Fun Fold Card that was created with a single 6″x6″ patterned piece of paper.
Another great use for double sided paper! Great tutorial. Thanks
I followed Lyssa’s directions and became enchanted with this fold! I love using both sides of the paper and making the most of 6 x 6 pieces. I made a dozen cards because I kept wanting to see how a given pattern would look with this plan!
I guess I can’t add a photo showing my attempts, but they are all so different andn special in their own way!
I absolutely love hearing this! If you’d like, you can share photos with me at Kristina@SunnyDayMemories.com I would love to see what you created!